
Every year as Thanksgiving approaches, I panic. It’s time to start re-teaching myself how to make pie crust. It’s time to look at every blog post and every cookbook I can get my hands on, to see what the magic trick is to making the perfect pie crust. Flaky, but still tender. Easy to roll out. Easy to make, in every aspect… putting the dough together, making the little discs, and then finally, rolling it out.
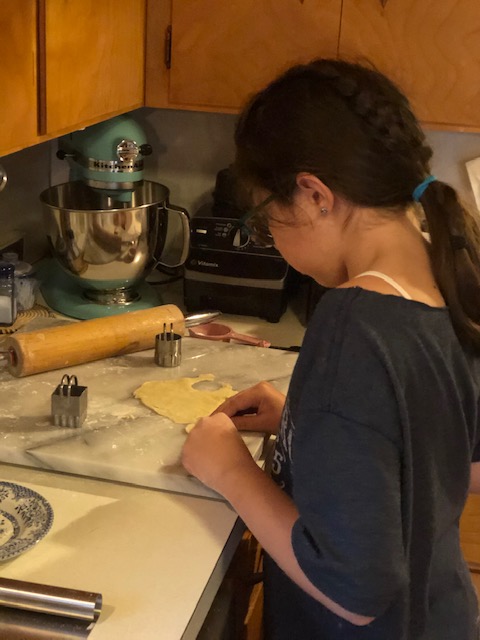
My helper.
What I finally came to is that I just have to make pie. Lots of pie. Or anything that requires a flaky crust.

Deep dish broccoli gruyère quiche.
After doing a ridiculous amount of research (and it’s not even my job to do all that research), I have discovered that the trick is this: make pie. Don’t be afraid. Just make pie. If the crust tears when rolling it out, patch it. If it looks ugly, don’t fret. If it ends up tough, better luck next time.

When the crust doesn’t cooperate, make a galette with it!
When I became obsessed with making the perfect flaky buttermilk biscuits, I made biscuits every week. I swapped biscuits with my neighbors, who were doing the same thing. I just kept trying. And I finally found the perfect recipe and technique that worked well for me. And I still make biscuits every Saturday for our family’s “Saturday Tradition”, which is a brunch with scrambled eggs and biscuits, and different kinds of jams. The eggs are really just an excuse to eat the biscuits and jam. And there are times when I make the biscuits that they don’t turn out quite as flaky, who knows why, but I don’t fret. Biscuits are just part of my repertoire now, and I am confident. Now I just need to do that with pie.

My helper made the decorative shapes.
So here’s what I noticed: the basic recipe is the same. The ingredients, the amounts…. basically the same. There are a few variations, but nothing to get excited about. Just all-purpose flour (or pastry flour), salt, sugar (maybe), unsalted butter, and ice water. And maybe something like lemon juice or apple cider vinegar (my choice) or white vinegar or white wine vinegar. Any one of those will do just fine.

And the technique [sigh]. Just choose one that you like best. Seriously. Do you want to mix in the butter by hand using a pastry cutter or two knives? Do you want to use a food processor? Do you want to smoosh the butter in with your finger tips? You can even use your Kitchenaid stand mixer (my choice lately, since I sometimes over mix or under mix when using a pastry cutter). But it really doesn’t matter. Just pick one and go with it.

My choice this season…
So here’s what I think I’m choosing for my go-to all-butter pie crust: in your mixing bowl, put 1 cup (4.5 ounces) pastry flour and 1.5 cups (6.75 ounces) all-purpose flour**, 1 teaspoon salt, and 1 teaspoon sugar (optional). Mix it with your tool of choice – pastry cutter, or paddle attachment if you are using your stand mixer, and put the tool into the bowl with the flour mixture. Put 1 Tablespoon Apple Cider Vinegar into a teeny bowl. Measure 1/2 cup of water in a measuring cup. Cut up 16 Tablespoons (two sticks) unsalted butter into 1/2 inch cubes. I make fast work of this by using my bench scraper, and cutting three lengthwise cuts, turning and cutting three lengthwise cuts again, and then cutting crosswise. Each butter pat will consist of nine cubes.

First set of cuts.

Second set of cuts.

Cubed butter ready to go in a flash.
Now put the bowl with the flour mixture and paddle attachment into the freezer. Put the 2 sticks of cubed butter and the 1/2 cup of water in the freezer as well. Leave them in the freezer for 20 minutes, no longer. You don’t want the water to freeze. During that twenty minutes go have a cup of tea and check your email, or obsessively look at pie crust recipes online. You may say that you don’t have room in your freezer to do this. First, are you really going to eat everything that is in your freezer? I didn’t think so. Clean it out. Secondly, if you still don’t have room, maybe skip the mixing bowl, but still put the flour mixture in the freezer, maybe in a smaller container that will fit. And put any tools that you are planning on using in the freezer (paddle attachment, pastry cutter, etc). And definitely the water and the butter. MAKE ROOM IN THERE.
[And no, I’m not going to post a picture of my freezer here.]
After twenty minutes, take everything out of the freezer. With your stand mixer on low speed, mix the flour for a second or two, then break apart the butter cubes and add them to the flour mixture a few at a time. Don’t worry about breaking each cube; they will break apart in the mixer. I break the pats into sets of three and throw them in. Keep mixing until all the butter is added, and the larger pieces of butter look like broken up pieces of walnuts, or large peas. With the mixer still going, drizzle in the vinegar, then drizzle in the ice water. I end up using all of it most of the time, but not always, so watch that dough like a hawk. Stop adding water (and turn off the mixer!) as soon as the dough starts to come together. The dough will look a bit shaggy. And maybe your mixer will start to groan. Grab some of the dough with your hand and squeeze it together. If it stays together when you poke at it, the dough is done. If it is still crumbly after you have squeezed it together, you need to add just a teeny bit more water.

Now, here’s a technique that I like. Take two lengths of plastic wrap and set them out onto your work surface (I actually like to get this ready before taking the ingredients out of the freezer. I want everything to be ready.)

Now dump half the dough onto each sheet of plastic wrap.

Working quickly-ish, pull up the corners of one of the plastic wrap sheets and bring them together to make a little bag of dough.

Now, with cupped hands, squeeze the dough in its plastic wrap firmly into a mound. Squeeze several times quickly and firmly to make sure the dough is cohesive. The dough should come together nicely.

Form the dough into a 5″ wide disc while dough is still in the wrap, and then make sure to wrap the dough well. No need to get more wrap. The sheet you have should be enough. Put that disc in the fridge. Now repeat with the other pile of dough. Voilà! You now have two lovely discs of pie crust dough. You should be able to see bits of butter. Let them rest in the fridge for at least 30 minutes, but better a couple of hours or overnight.

About rolling out the dough – your rolling pin should be heavy! The light weight ones just won’t do the trick. Take your disc of dough out of the fridge about 15 minutes before you want to roll it out. You want it to be pliable. If your kitchen is very warm, maybe 5 or 10 minutes will do. But don’t make the mistake that I often make, which is trying to roll out dough that is too cold. It will crack! Throw your pie pan into the freezer. And get a bag of frozen vegetables (I have one that is reserved specifically for this use) and place it on your work surface. This will chill the work surface while your dough is becoming pliable.

You can swoosh it around to get a wider area chilled.
When dough is pliable, after about 10 to 15 minutes, put the frozen veggies back in the freezer and make sure your work surface is dry. It should be nice and cold! Use enough flour on your rolling out surface so that your dough doesn’t stick. Flour your rolling pin.

Not a lot of flour!
Flour your disc of dough also.

You are now ready to roll. He he….
Start from the center and roll out, avoiding rolling past the edge of the dough. Give the disc a quarter turn every couple of rolls, and roll again. Keep doing this. Use your bench scraper to gently move it underneath the dough if it is sticking. Toss a teeny bit of flour underneath to keep it from sticking. Your dough is much less likely to stick if you have chilled your work surface well. This dough rolls out like a dream.

Once the dough is about 1/8″ in thickness, take a pizza cutter or knife and trim off the edges to make a nice round circle (this is optional). The circle should measure whatever your pie pan is from edge to edge, plus 3″. I always measure to make sure I’ve got the dough rolled out wide enough to do the job. 13″ is usually a good size, but measure please. Pull the cold pie pan out of the freezer. Fold your dough in half, then in half again, and place the dough in the pie pan with the middle fold-y corner thingy in the middle of the pie plate.

If the dough has a lot of extra flour on it, brush the extra flour off. Unfold and move the dough into the pan without stretching it. Leave about a 1/2″ overhang of dough past the rim, and trim off the rest. Fold the edges under.

Edges folded under.
Now crimp the edges with a fork or make a cute little design with your knuckles (if this is for a one-crust pie, such as pumpkin or pecan pie). Don’t use your finger tips, because you might tear the dough. Use your knuckles.

I have always had vein-y hands! X-Files comes to mind….

Cute!
Chill the crust in the fridge for at least a half hour before using. Or, if you are planning ahead, wrap the whole thing, pie plate and all, in plastic wrap (sorry about all the wrap), then aluminum foil, and put it in your freezer. You can use it whenever your are ready. This makes your pie making a breeze. This is, of course, for pies such as pumpkin or pecan. If you are making pie crust for a double crust pie, like apple pie, you can freeze the discs of dough, to be rolled out at a later date, if you like the idea of making ahead. I surely do. Just pull out the discs of dough the night before and let defrost in the refrigerator overnight.

Now, I have to tell you something about this pie crust odyssey I have been on. You know how they say to keep everything cold? Well, it really helps!!! It makes a huge difference. And all the resting periods in between? That makes a difference too. I’m one of those people that has to try it my own way first. Resting periods? Nah, I don’t have time for that. Keep everything cold? That’s going overboard. The chilling of the surface with frozen veggies? That’s ridiculous! But truly, truly, I say unto thee, Do these things, and thou shalt have a flaky, all-butter pie crust that is easy to roll out. That is all.
Update 3/16/21: I have a new favorite pie crust recipe that never fails. You can read about it here. Don’t get me wrong; this one that you are reading about now is really really good. But the newer one has more consistent results, and everyone loves it.
** I use 1 cup pastry flour, when I have it on hand, and 1.5 cups all-purpose flour, to make the crust more tender. I believe that pastry flour is key to the tenderness, so it’s really worth the extra trouble to have it in your flour arsenal.
***This recipe makes two standard 9 inch pie crusts. This recipe does not make enough for two 9 inch deep dish pie crusts.


Pingback: Hearty Quiche | and everything nice
Pingback: Mini Mince Pies | and everything nice
Pingback: Apple Pie | and everything nice
Pingback: Perfect Every Time Pie Crust | and everything nice
Pingback: Apple Crumb Pie | and everything nice